For an explication on phantogram principle, see here (will be improved later). For this tutorial, the subject should be put on a perfect square. Pour une explicatin sur le principle des fantogrammes, voir ici (sera amélioré plus tard). Pour ce tutoriel, le sujet doit être posé sur un carré parfait.
1) Open the stereo 1) Ouvrir la stereo
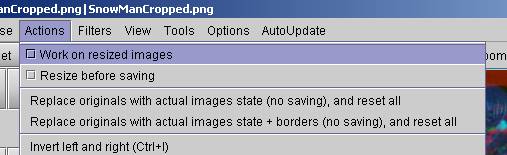
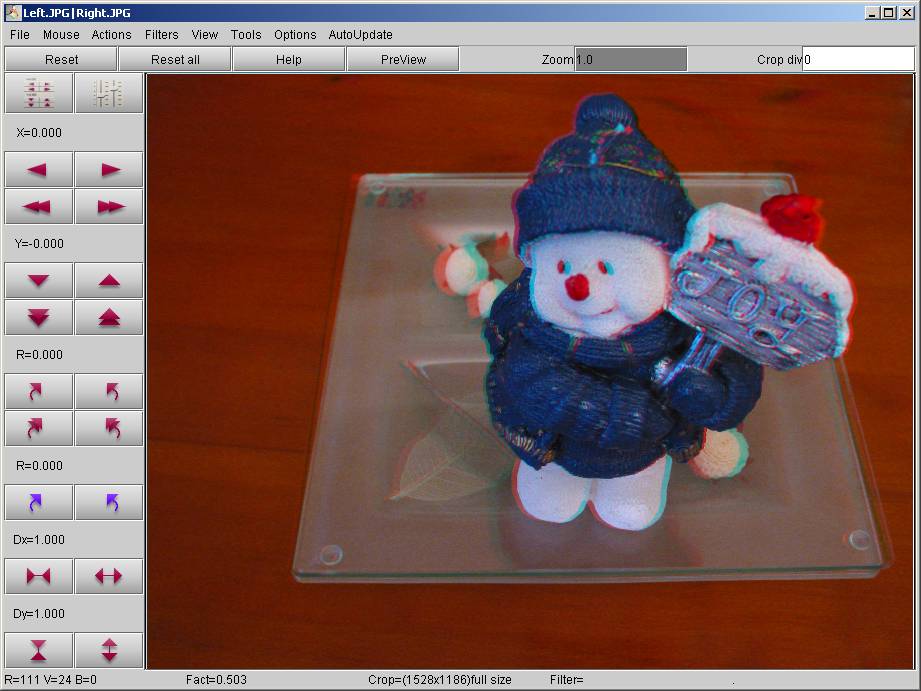
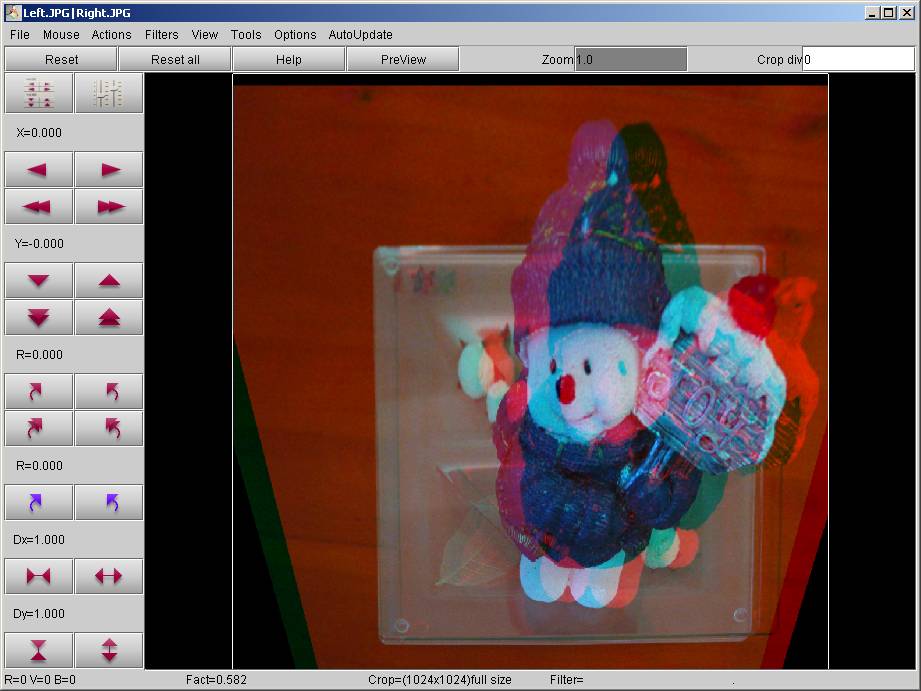
Open AnaBuilder, and drag & drop the 2 image files to open them. You should get a stereo anaglyph in AnaBuilder's main panel. Use key Ctrl+I if the stereo is pseudo. Ask to work on full size image (resized by default, uncheck the resize option), to get a better quality result. Ouvrir AnaBuilder, et tirer & lacher les 2 fichiers image pour les ouvrir.Vous devez obtenir une stereo anaglyphe dans le panneau principal d'AnaBuilder. Utilisez la touche Ctrl+I si la stereo est pseudo. Demandez à travailler sur des images en pleine taille (redimensionnées par défaut, décocher l'option de redimensionnement), pour obtenir un résultat de meilleur qualité.
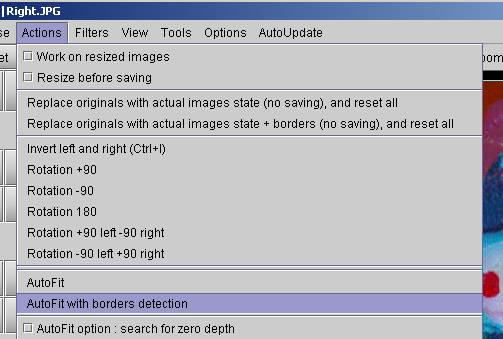
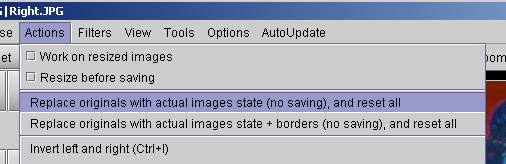
Ask for "Autofit with borders detection" to adjust the stereo and ask to replace original with current images. Demandez un "AutoCale avec détection des bords" pour ajuster la stereo et demandez à remplacer les originaux par les image courantes.
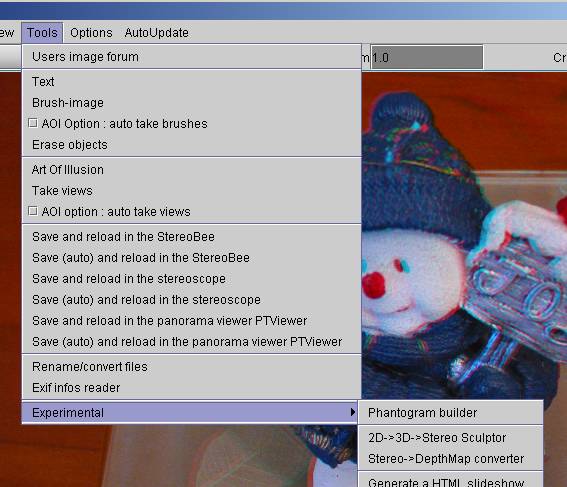
2) Phantogram tool 2) Outil fantogramme
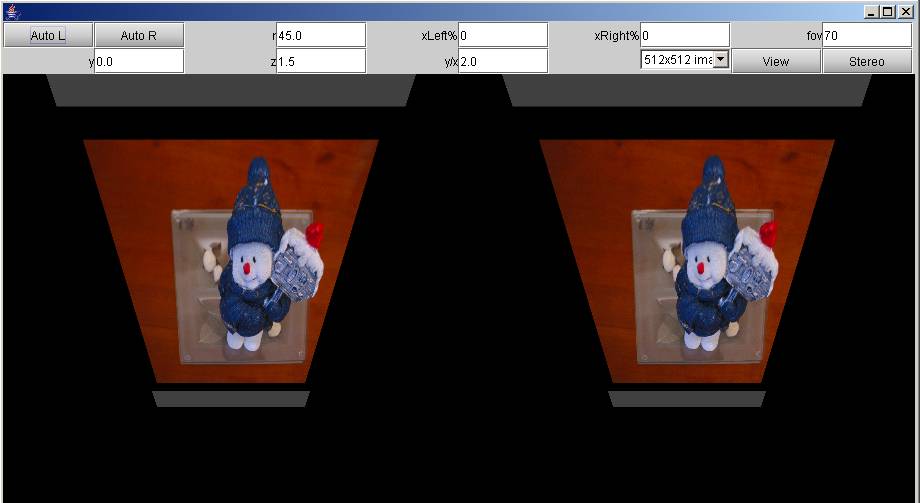
Launch the phantogram tool. You should get a first perspective correction view. Lancer l'outil fantogramme. Vous devez obtenir la visualisation d'une première correction de perspective.
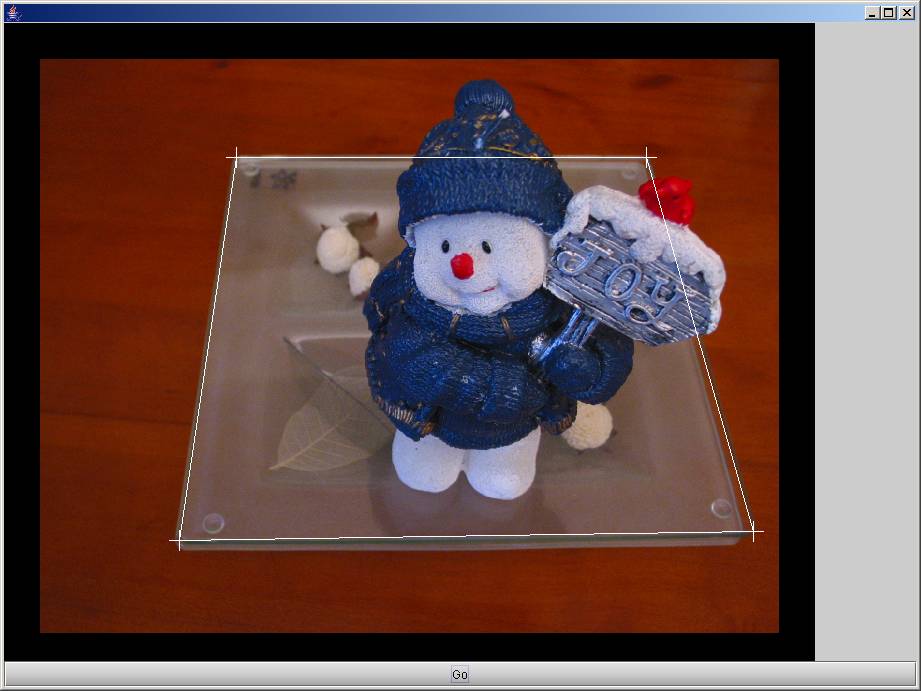
Click on "Auto L" button. You should get a visualisation of the left view. Click 4 times to show precisely the reference square (draw with white lines). And click on "Go" button. Cliquez sur le bouton "Auto L" Vous devez obtenir une visualisation de la vue gauche. Cliquez 4 fois pour montrer précisément le carré de référence (dessiné avec des lignes blanches). Cliquez sur le bouton "Go".
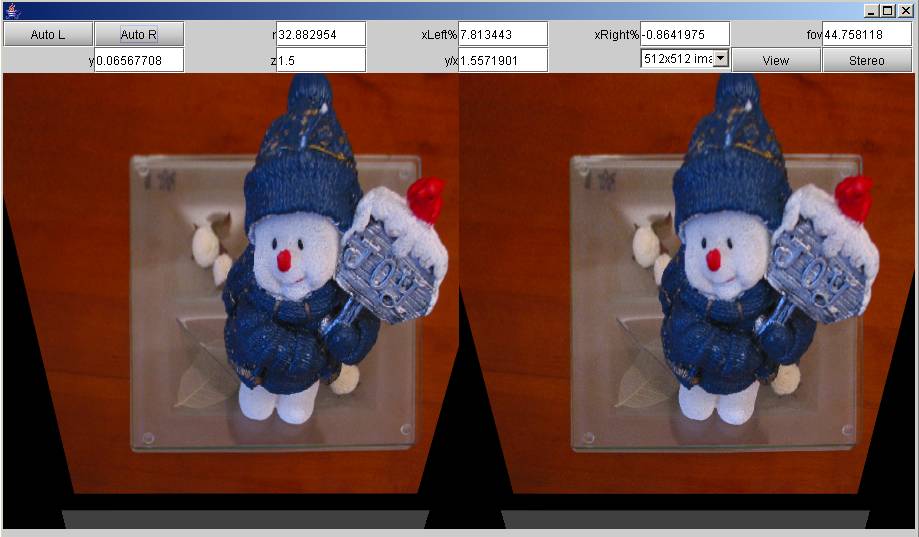
After a calculation, you should get back the phantogram tool with first auto-adjusted values. Do the same with button "Auto R" for the right view. Après un calcul, vous devez obtenir à nouveau l'outil fantogramme avec un premier auto-ajustement des valeurs. Faire de même avec le bouton "Auto R" pour la vue droite.
3) Fine tuning 3) Ajustement fin
You can manually tune the result to improve it : change values, and then click the "View" button. In particular, adjust the FOV value to get an object view as large as possible, without losing a part of it. For this example you can also tune the Y value to move it to the bottom (because the subject is going up to the reference square). Y value changes also need Y/X changes, but this could be neglected (you can use temporary "Stereo" export to judge of it in AnaBuilder's main panel by a crop selection). It seems to me that the good final values are nearly FOV=44, Y=0.2, and Y/X=1.4. Click on the resolution selector to obtain a better quality (be careful, high values are very time consuming), for example choose 1024x1024. Click on "Stereo" button to export the result to AnaBuilder. Vous pouvez ajuster manuellement le résultat pour l'améliorer : changez les valeurs, et cliquez ensuite sur le bouton "View". Ajustez la valeur FOV pour obtenir une vue aussi large que possible de l'objet, sans perdre un morceau. Pour cet exemple vous pouvez aussi ajuster la valeur Y pour déplacer vers le bas (parce que le sujet dépasse du carré de référence vers le haut). Les changements sur la valeur Y nécessitent aussi des changements de Y/X, mais cela peut être négligé (vous pouvez utiliser des exports "Stereo" pour juger du résultat dans le panneau principal d'AnaBuilder avec une sélection de crop). Il me semble que les bonnes valeurs finales sont environ FOV=44, Y=0.2, et Y/X=1.4. Cliquez sur le selecteur de résolution pour obtenir une meilleure qualité (attention, les fortes valeurs sont très consommatrices en temps), par exemple choisissez 1024x1024. Cliquez sur le bouton "Stereo" pour exporter le résultat dans AnaBuilder.
4) End 4) Fin
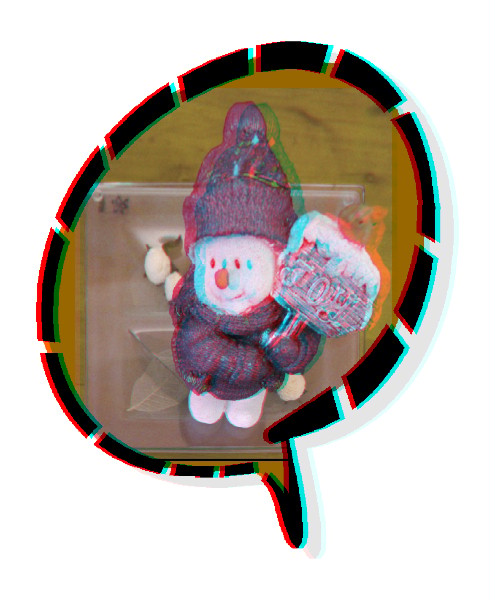
Adjust the stereo window on the background (X=-0.034), crop and save. Here is my result, after a red/cyan desaturation, and a multi-framing. Print it and put it on a table to view it with an angle of 45°. Ajustez la fenêtre stereo sur le fond (X=-0.034). Croppez et sauvegardez. Voici mon résultat, après une désaturation rouge/cyan, et une mise en cadre multiple. Imprimez le et posez le sur une table pour le regarder avec un angle de 45°.